Particle Photon Server Has Failed to Process Request on Time Try Again
Build a proficient-looking IoT device with the Particle Photon, Blynk and a 3D-printed enclosure.
A few months ago I was walking on the beach and realised that my software engineering life-path is mostly abstract logic rather than something yous tin touch, and a flake mesmerised by the waves breaking on the shore and a bit driven past this physical-wish, I decided that building an IoT device to monitor the environment around me would give meaning to my otherwise banal life.
The repository for all of this is here: https://github.com/lucavallin/hytta
A cursory history of the projection
I had never worked with such devices before and every bit soon as I got domicile from the seaside I started researching the topic and coming up with possible solutions. In the beginning my goal was not but to create a overnice product, but also to apply the experience as an do for my skills, notwithstanding I had to review my plans a few times since the scope was becoming either too wide and would take too long for a single person to finish or the last product would end up existence non and then pleasing (or too expensive to reproduce). By the way, if you lot want to learn more about IoT, these are ii adept books that I am reading or that I take read: Designing the Internet of Things (bones) and Internet of Things for Architects (advanced).
Here are some plans that were ditched:

- A RaspberryPi and Grove Sensors, both are very like shooting fish in a barrel to use and Grove Sensors practise non require soldering, making it a proficient pick for prototyping. The final product, still, was going to exist too chunky and overall ugly to fit in a house with scandinavian-style interiors. Products must expect good as well. As well, the RaspberryPi is a full-fledged computer and I hate setting upward stuff, Arduino and like boards accept more the plug-n-play way that I like.
- I wanted to sharpen my GoLang skills and idea that using it in this projection could accept been a fun thing to do, but as it turned out, Python seems to exist the king here (on the RaspberryPi) and most sensor-libraries don't offer support for other languages. I had to give up this plan too, and in the end, settled for the most common (and the sane man'due south) selection in the IoT world: C++.
- Building my own APIs seemed to be a smart move at showtime — merely I realised how long doing everything myself would take, way as well much for my weekends. I too considered using a tool like AWS IoT or Google Cloud, but in the end a fully managed platform made the most sense.
- I was going to use just some cardboard and glue for the enclosure, only that doesn't really provide sleek looks, unless you can produce something in the ranks of Google Cardboard. Not my instance.
What follows what I came upward with later months of trying and I find it pretty dope.
Particle Photon

The Particle Photon is a truly amazing piece of applied science. Information technology tin be programmed like an Arduino, but it is half the size of a credit menu, has integrated WiFi and costs just ~20 euros on their website, or Seeed Studio or here.
What makes information technology smashing is:
- The Particle Cloud , a fully managed cloud solution where y'all tin check the status of the board, ship messages to it, call functions running in the firmware, Over-The-Air updates, a white-label portal that you can resell to your customers, integrations and authentication providers, and a Web-IDE. If you choose any cellular-enabled board, you can even manage SIMs in in that location. Information technology's totally free for the first 100 devices, that'southward all actually fucking rad.
- The Particle CLI lets y'all setup (it is the beginning command you would run) the device'due south name, operating system (a minimal firmware and then you can manage the lath), WiFi connection and auth keys to their cloud. Many other commands are bachelor, enabling you to compile and flash your firmware, or to check for any error in the board. Yous can also search and install libraries to use in your own device from their repository.
- The Particle Workbench, a Visual Studio Code extension that works seamlessly with the board and the CLI, allowing you to practise everything from the IDE.
There is a lot more that could be said about it, but I would only advise you to accept a wait at the Quickstart/Tutorials/Reference sections in the Particle docs.
Sensing
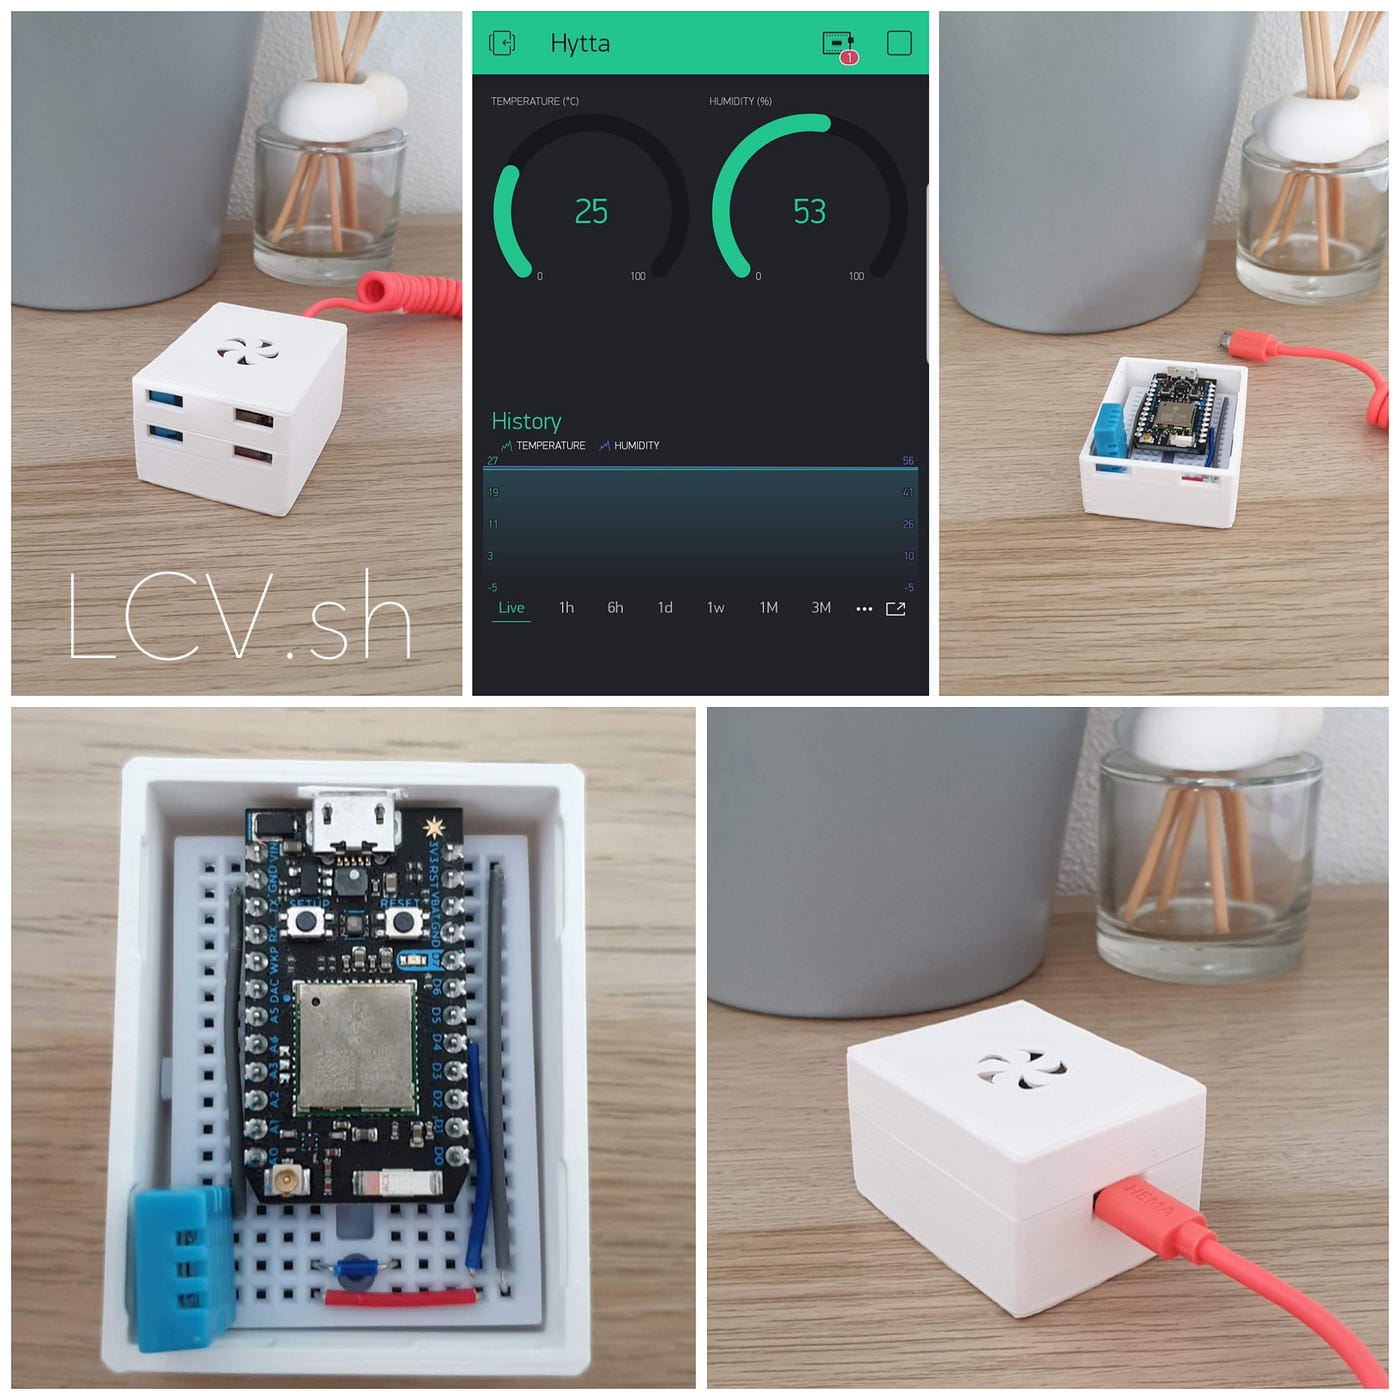
After ditching the Grove DHT sensor (DHT = Digital Humidity and Temperature) for the reasons above, I got myself a loose version of it (without the "packaging" then that it can be mounted on a breadboard — a small-scale one, 170-pins for this project) for a few euros.
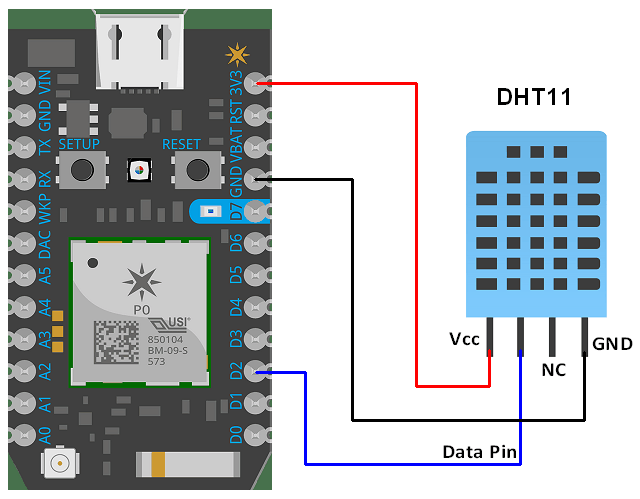
The wiring is straight forward, just be conscientious to not invert Vcc and GND since the sensor bursts up in flames (I know considering it happened twice). Co-ordinate to the datasheet, you'd also need a pull-up resistor on the data pin — I am currently not using one and I oasis't encountered whatsoever issue, merely I am no electronic engineer and I am probably very wrong.
Important to say, the DHT11 sensor (the i I am using) is non very precise and the temperature could exist off past 2 degrees (as opposed to DHT22, more expensive, larger and more precise).
Enclosure
I recently purchased a 3D printer (topic which yous can read more about here) so I was able to replace the paper-thin-and-mucilage box with a more sophisticated case that I was able to find on Thingiverse.
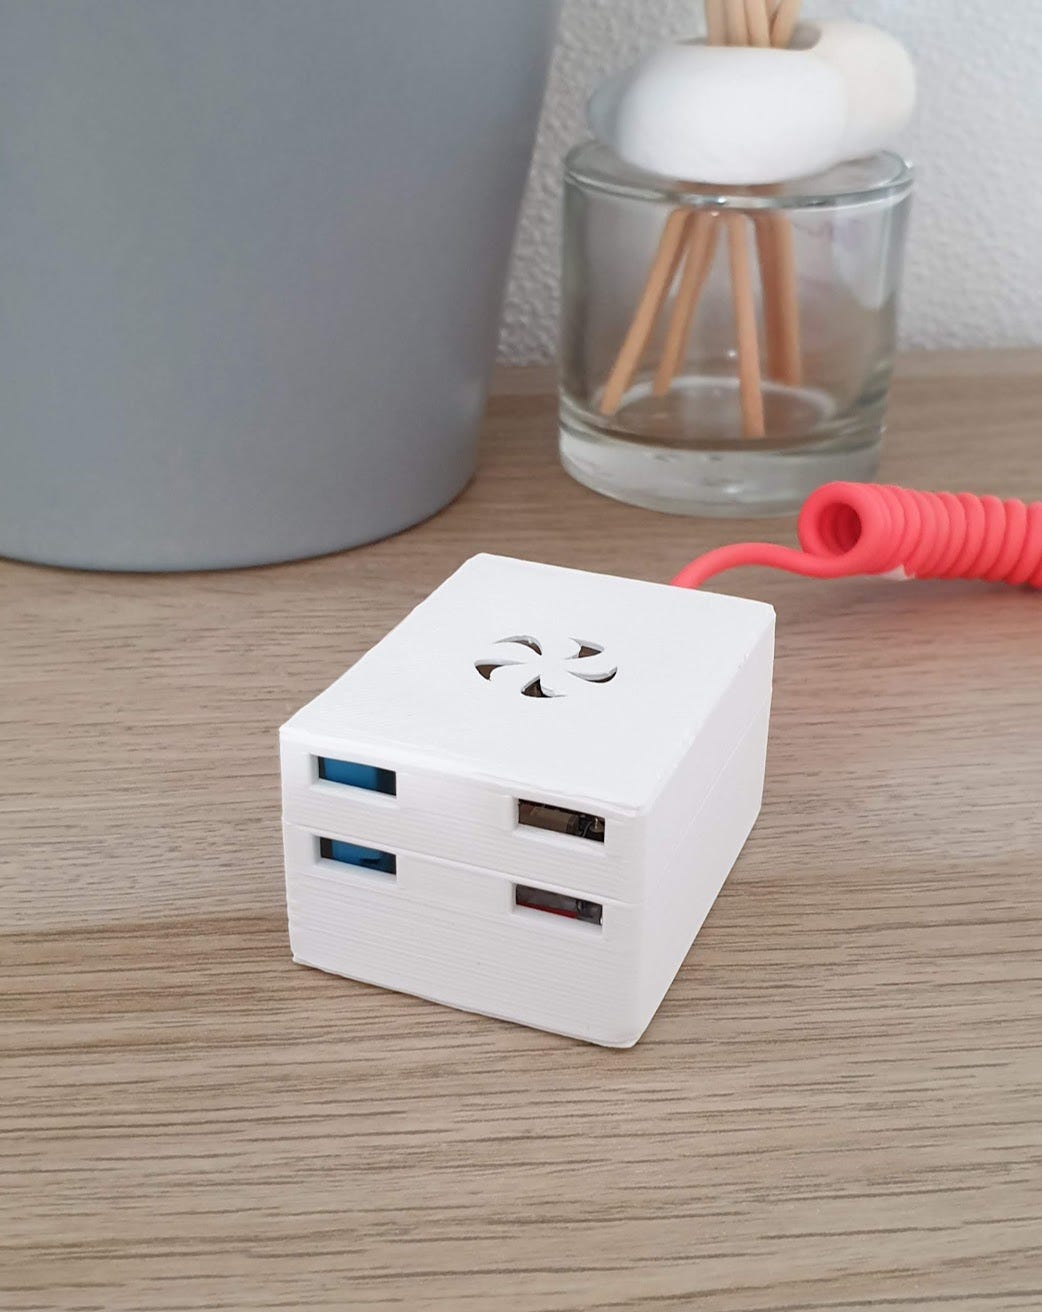
It is designed to fit the Particle Photon and my breadboard just right, leaving holes for the USB cablevision, ventilation and checking the status LED on the board. The only problem I establish is that due to the microcontroller, the atmosphere in it gets a lilliputian warmer than outside, and so measurements are not realistic. This could probably be fixed via firmware tweaks or by adding more ventilation.
Anyways, printing the ii parts (base and snap-fit embrace) takes somewhere around two hours and doesn't require supports, fifty-fifty for the openings on the sides. The cover is best printed upside-downwards fifty-fifty though this impacts the quality of the finish on the top - which is as well a little bit as well thin and tends to warp.
Blynk
Blynk is a hardware-doubter IoT platform with customisable mobile apps, individual cloud, device management, analytics, and machine learning.
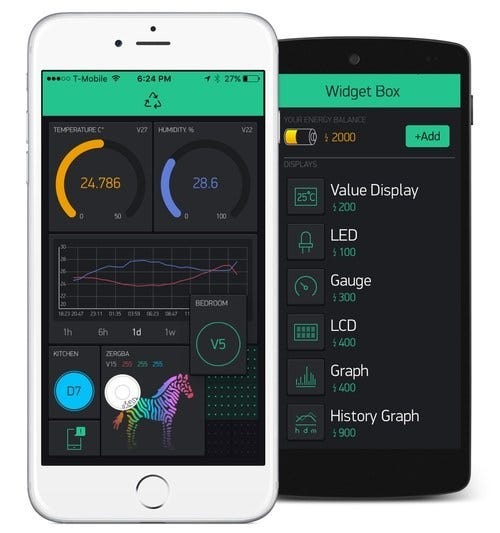
It provides a full solution to building a connected device and I chose it mine since it's so pleasant tom work with and you tin can get a polished app prepare in a few hours , all parts included — I seriously can't think of a more complete concept. Also, a wide array of boards and languages are supported.
- The Blynk app tin be downloaded from the App Store and the Google Play Shop. You need to create a new projection selecting which board y'all wish to use and afterwards that you'll exist able to create a dashboard choosing from a broad range of components. Every component tin can be configured in a number of means, for example you can customise labels and colours, but mostly chiefly, the pin on the device from which it will get its input or feed its output (more than on this later). They also offer white-characterization plans, so you lot can create and sell a Blynk-based app as your production.
- The Blynk library (in this example the C++ version) provides all the tools yous need to substitution letters between the app and the device. Yous'll need an auth token (provided via e-mail when you create a new project) to be able to connect and everything else is explained here: http://docs.blynk.cc/#blynk-firmware. The nearly impressing fact most Blynk is that you might end up writing no code at all, the read instructions can be configured in the app and in one case the client is started on the device, it will automatically fetch and run that configuration. Read about this here: http://docs.blynk.cc/#blynk-main-operations-virtual-pins.
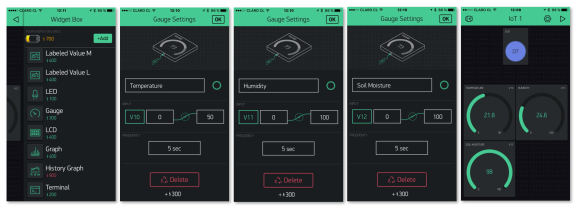
- The Blynk server handles advice from and to the device and yous can either employ theirs (with limitations, widgets take a price and you lot tin can besides utilize 3 or iv for gratis) or host your own to have access to unlimited components.
Firmware
Finally, here is what the firmware of the device looks like. Showtime matter kickoff, make sure you take the Particle Workberch extension installed in Visual Studio Lawmaking and drib the project.properties file into the projection directory (the directory structure follows a set of rules that help keeping all Particle firmwares standard and easy to empathize, see the docs here: https://docs.particle.io/tutorials/programmer-tools/cli/#working-with-projects-and-libraries)
          name=hytta
dependencies.blynk=0.v.4
dependencies.PietteTech_DHT=0.0.nine
This configuration, besides setting the proper noun of the project, defines 2 dependencies, Blynk and a library to read from the DHT sensor.
Let'south take a look and the .ino file at present:
          #include "PietteTech_DHT.h"
#include <blynk.h>// Setup Blynk serial output for debug prints and auth
// (get the auth token in the Blynk app projection settings)
#ascertain BLYNK_PRINT Serial
char blynkAuth[] = "";
BlynkTimer timer;            // Setup DHT sensor DHT11/21/22/AM2301/AM2302 and digital pin (D0 cannot be used)
#define DHTTYPE DHT11
#define DHTPIN D4
PietteTech_DHT DHT(DHTPIN, DHTTYPE);
Here I am including the two libraries and setting up the Blynk client, which requires the auth token I talked about before. A BlynkTimer object is created and this will be used for calling a my read-and-send-data function periodically. In the stop, the DHT reader is setup every bit the library docs prescribe (and avoiding the pin D0 which is incompatible with PietteTech_DHT since it doesn't back up interrupts).
          void setup()
{
            Serial.brainstorm(9600);
            filibuster(5000);
            // Read sensor one time per minute
            timer.setInterval(60000L, readDHT);
            Blynk.brainstorm(blynkAuth);
            DHT.brainstorm();
}
The setup function establishes the serial communication and after assigning a part to run to the timer (going off once every minute), it initialises the Blynk client and the DHT reader.
The readDHT function assigned to the timer looks like this:
          // Blynk currently handles the waiting time, if this wasn't the case it would be
// a good rule to wait ~2500ms between each read according to the PietteTech_DHT library
void readDHT()
{
            int result = DHT.acquireAndWait(g);              switch (event)
              {
              case DHTLIB_OK:
              Serial.println("OK");
              Particle.publish("status", "OK", PRIVATE);
              suspension;
              case DHTLIB_ERROR_CHECKSUM:
              Serial.println("Error\n\r\tChecksum mistake");
              Particle.publish("status", "Checksum error", Private);
              break;
              case DHTLIB_ERROR_ISR_TIMEOUT:
              Serial.println("Error\n\r\tISR fourth dimension out error");
              Particle.publish("status", "ISR time out error", PRIVATE);
              break;
              example DHTLIB_ERROR_RESPONSE_TIMEOUT:
              Serial.println("Error\n\r\tResponse time out error");
              Particle.publish("status", "Response fourth dimension out error", PRIVATE);
              break;
              case DHTLIB_ERROR_DATA_TIMEOUT:
              Serial.println("Error\n\r\tData fourth dimension out error");
              Particle.publish("status", "Data time out error", PRIVATE);
              suspension;
              case DHTLIB_ERROR_ACQUIRING:
              Serial.println("Error\n\r\tAcquiring");
              Particle.publish("status", "Acquiring", Private);
              break;
              instance DHTLIB_ERROR_DELTA:
              Serial.println("Error\n\r\tDelta time likewise modest");
              Particle.publish("status", "Delta time too small", PRIVATE);
              break;
              case DHTLIB_ERROR_NOTSTARTED:
              Serial.println("Mistake\north\r\tNot started");
              Particle.publish("status", "Non started", PRIVATE);
              intermission;
              default:
              Serial.println("Unknown error");
              Particle.publish("status", "Unknown error", Private);
              break;
              }                          // Become temperature and humidity, then send some information to series
              // and the Particle deject for debugging
              bladder temperature = DHT.getCelsius();
              Serial.print("Temperature (oC): ");
              Serial.println(temperature, 2);
              Particle.publish("temperature", String(temperature), Individual);                          bladder humidity = DHT.getHumidity();
              Series.print("Humidity (%): ");
              Serial.println(humidity, 2);
              Particle.publish("humidity", String(humidity), PRIVATE);                          // Send data to the Blynk API
              Blynk.virtualWrite(0, temperature);
              Blynk.virtualWrite(1, humidity);
}
Outset information technology acquires data from the DHT sensor, handles a number of "bad" (and good) results, then actual data is obtained and together with some debug information, sent over serial and to the Particle Cloud with Particle.publish . At the bottom, I am using the virtualWrite method to write the values to Blynk'due south virtual pins (used in place of the analog/digital pins when Blynk cannot read from them directly based on configuration but more than processing is required, like in this case with the read logic).
At the end, this is the loop:
          void loop()
{
            Blynk.run();
            timer.run();
}
The run method is called on Blynk and timer which will take care of handling communications with the Blynk server and to perform the reading of the temperature and humidity values equally specified.
To make it real, you need to compile the firmware, put the Particle Photon in DFU mode so flash information technology. Afterward a while you should start seeing information coming into the Blynk app (and in the Particle Cloud).
Final word
It has been quite a journey from that 24-hour interval on the embankment and I've learned and then much nigh IoT, SoC and sensors. I've once more learnt that sticking to the most common path (as in C++ and microcontrollers) can very much help in achieving a better result without unnecessary complications, after all there's a reason if that is what most people are doing.

Sensors might wait like mystical objects, simply eventually they turn out to be just electronics that are able to sense the world thanks to well defined concrete phenomena (if you lot don't burn them in the process).
The biggest facilitator in the whole projection has been Blynk, there's so much I would have had to have care of without it. Communication from and to the device, storing data and displaying in a pleasant-to-the-centre dashboard sounds like a good claiming to sharpen your skills, but it really takes forever for a single person.
3D Printing my own enclosure was very satisfying too, for the first time I am able to finish a real-globe physical-device that looks (almost) every bit if information technology was bought in a store — astonishing right?
Promise you enjoyed the story, and hopefully this commodity will inspire you into creating something you lot can call your own 😃
Source: https://itnext.io/build-a-neat-iot-product-with-the-particle-photon-blynk-and-a-3d-printed-enclosure-63d78d871778
0 Response to "Particle Photon Server Has Failed to Process Request on Time Try Again"
Post a Comment